
First, clean an Avanti HVLP paint sprayer, release any pressure, and disassemble the gun. Next, clean all parts with a suitable solvent and reassemble the sprayer.
Maintaining your Avanti HVLP paint sprayer through regular cleaning ensures optimal performance and extends lifespan.
Proper cleaning removes paint residue, prevents clogging, and prepares the sprayer for its next use. A clean paint sprayer is crucial for achieving smooth, professional project finishes.
Left uncleaned, sprayers can suffer from performance issues, leading to poor spray patterns and wasted materials. Whether you’re a DIY enthusiast or a professional painter, understanding how to clean your Avanti HVLP paint sprayer is a must.
Follow along as we delve into the steps necessary to keep your sprayer in top working condition, making it an indispensable tool in your painting arsenal.
Cleaning Supplies Needed
Regular maintenance of your Avanti HVLP paint sprayer is crucial for its longevity and optimal performance. A significant part of this upkeep involves cleaning your sprayer thoroughly after each use.
With the proper cleaning supplies, you can ensure your paint sprayer works efficiently for many future projects.
Let’s tackle the must-have cleaning supplies you’ll need to get your Avanti HVLP paint sprayer sparkling clean and ready for action.
What You’ll Need
To kickstart the cleaning process, gather the essential tools and materials designed to cleanse different components of your paint sprayer without causing any damage.
Considering the complexity of the device, using the correct supplies will simplify the cleaning routine and preserve the integrity of the sprayer.
List of Supplies
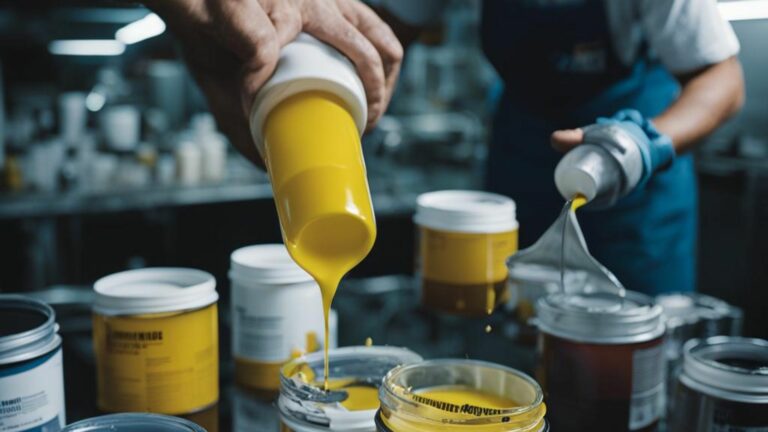
- Thinner or Solvent: Compatible with your paint (Oil-based paints require mineral spirits or turpentine, while water-based paints can be cleaned with soap and water).
- Cleaning Brushes: Specific brushes for HVLP paint sprayers to remove paint from tiny crevices.
- Pail or Container: To hold the cleaning solution.
- Cleaning Rags or Towels: Clean, lint-free cloths are preferable for wiping parts dry.
- Gloves: To protect your hands from harsh chemicals.
- Safety Glasses: To safeguard your eyes during the cleaning process.
- Lubricant: To keep moving parts operating smoothly after cleaning.
- Waste Bucket: For the disposal of used thinner or solvent.
- Filter: To remove any residue from the cleaning solution when reusing it.
Preparing the Workspace
Before diving into the cleaning process, setting up a well-organized and safe workspace is essential.
Choose a well-ventilated area to avoid inhaling fumes from the solvents or thinners.
Lay down protective sheeting or newspaper to shield the workspace from any spills.
| Workspace Preparation Step | Details |
|---|---|
| Ventilation | Ensure the space is well-ventilated to dissipate fumes. |
| Surface Protection | Cover the workspace with a drop cloth or newspaper. |
| Waste Disposal | Have a proper waste bucket ready for solvent disposal. |
Wear protective gear, such as gloves and safety glasses, to prevent skin and eye contact with harmful cleaning agents.
Having a fire extinguisher nearby is also wise, given the flammability of some solvents.
With your supplies and workspace prepared, you’re all set to ensure your Avanti HVLP paint sprayer’s maintenance is as efficient and safe as possible.
Disassembling the Paint Sprayer
Maintaining your Avanti HVLP paint sprayer is crucial for its longevity and ensuring a flawless finish on your projects.
Starting with the disassembly process sets the stage for a thorough cleaning.
By systematically removing and cleaning each component, you can prevent paint buildup and ensure your sprayer operates efficiently for your next job.
Removing the Sprayer Components
Begin by unplugging the sprayer to ensure safety. Remove the air and paint hoses, and release the pressure from the system by following the manufacturer’s instructions.
Organize each part meticulously to facilitate an easy reassembly.
- Detach the air cap and remove the fluid nozzle.
- Unscrew the spray gun handle carefully.
- Extract all removable dials and knobs.
Disassembling the Nozzle
The nozzle is at the heart of your Avanti sprayer’s performance. Unscrew the nozzle cap gently and lift out the nozzle.
A soft brush will be your best ally to remove paint residue without causing damage.
Soak the nozzle parts in a thinner that is appropriate for the type of paint used to aid in the loosening of paint particles.
Cleaning the Paint Container
Empty any remaining paint from the container and rinse with a suitable solvent. Use a cleaning brush to scrub the container walls.
If the paint has dried, allow the container to soak to soften it before scrubbing it away.
Inspecting for Residue
After cleaning all parts, inspect each component for paint residue. Pay special attention to the tiny holes in the air cap and the fluid nozzle.
Any missed spot can affect the spray quality. A magnifying glass can help identify any clogged areas that need re-cleaning.
| Component | Cleaning Method | Notes |
|---|---|---|
| Nozzle Set | Brush and solvent soak | Check for clogs |
| Paint Container | Rinse, scrub, soak if needed | Ensure all paint is removed |
Cleaning the Components
Cleaning your Avanti HVLP paint sprayer is crucial for maintaining its performance and longevity. Over time, paint sprayers can accumulate paint residue, leading to clogging and uneven spray patterns.
To ensure that your paint jobs remain flawless, it’s essential to clean the components of your sprayer thoroughly after each use.
Follow this step-by-step guide on how to keep your Avanti HVLP paint sprayer in pristine condition.
Cleaning the Nozzle and Needle
The nozzle and needle are critical components that directly affect your sprayer’s performance. To clean them properly:
- First, disconnect the power source to ensure safety.
- Next, remove the nozzle and needle according to the manufacturer’s instructions.
- Use a soft brush and a specialized cleaning solution to scrub any paint residue off the parts gently. Stubborn spots may require a little soaking in the solution.
- Once clean, dry the nozzle and needle thoroughly before reassembling the sprayer.
Using Cleaning Solution
A good cleaning solution is essential for dissolving paint and ensuring that all components of your sprayer are free from contaminants. Consider the following:
- Select a cleaning solution compatible with the type of paint you use (water-based, oil-based, etc.).
- Pour the solution into the paint cup and attach it to the gun.
- Spray the solution through the gun to clean the internal passages. Repeat this process until the spray is clear.
Removing Paint Build-up
Removing paint build-up is crucial for preventing clogs. Pay special attention to areas like the paint cup and fluid passages:
- After using the clean solution, check for any remaining paint build-up.
- Use cleaning brushes or picks to remove dried paint from hard-to-reach areas.
- Rinse all components with clean solvent to ensure no debris is left behind.
Cleaning the Air Cap
The air cap can affect the spray pattern, so keep it clean:
- Remove the air cap and inspect it for paint residue.
- Use a soft-bristled brush and solvent to clean all the holes.
- Dry the air cap completely before reattaching it to the gun.
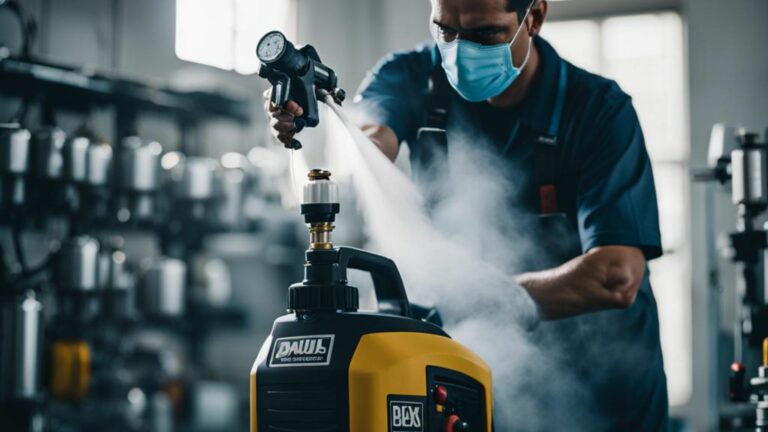
Flushing the Spray Gun
Regular flushing of the spray gun ensures a clear path for the paint to flow:
- Detach the paint cup and fill the gun with cleaning solution.
- Point the gun into a waste container and activate the trigger, allowing the solution to run through the gun.
- Repeat the process several times until only the clean solution is being expelled.
- Disassemble and clean individual parts if necessary.
Keeping your Avanti HVLP paint sprayer clean ensures reliable performance and professional results.
Be sure to follow these steps to extend the lifespan of your equipment and maintain optimal functionality.
Reassembling the Paint Sprayer
Once you’ve cleaned your Avanti HVLP paint sprayer components, it’s time to piece the device together. This phase is crucial in ensuring your sprayer operates effectively and is ready for the next project.
Follow these structured steps to reassemble your sprayer seamlessly and maintain the longevity of your tool.
Reattaching the Components
Begin the reassembly process by reconnecting the main elements of the Avanti HVLP paint sprayer. This includes attaching the air hose, securing the gun to the hose, and reattaching any handles or harnesses.
Ensure every part snaps back into place firmly to prevent any leaks or loose connections during operation.
- Check the air hose for any kinks or wear before reattachment.
- Secure the gun tightly to avoid unnecessary vibration and ensure precision in spray patterns.
- Inspect all seals during this process to ensure they’re not damaged or compromised.
Assembling the Nozzle
Focus next on the nozzle, as it’s the heart of the sprayer’s operation. Carefully align the nozzle components and thread them without forcing any parts.
A thin lubricant layer can assist in smooth reassembly and protect the threads.
- Clean the threads to remove any residues before applying lubricant.
- Align the air cap and nozzle correctly for an even spray pattern.
- Hand-tighten to avoid overtightening and potential damage.
Refilling the Paint Container
The paint container is ready to be refilled once the sprayer is reassembled. For optimal performance, use a strainer to filter the paint, preventing clogging and ensuring a smooth application.
Then, attach the container securely to the spray gun, ensuring the seal is intact to avoid leaks.
Checking for Proper Fit
Finally, inspect all fittings for a proper, snug fit. Trigger the gun lightly to check for air or paint leaks and listen for irregular sounds that might indicate issues.
With all components reassembled correctly, your Avanti HVLP paint sprayer should be in top form, ready to deliver a flawless finish on your next project.
| Checkpoints | Description |
|---|---|
| Seals & O-rings | Ensure they are not worn out or placed incorrectly. |
| Hose & Gun Connections | Verify that all connections are airtight. |
| Nozzle & Air Cap Alignment | Double-check for correct alignment. |
| Operational Test | Perform a test spray to confirm functionality. |
Testing the Cleaned Sprayer
After meticulously cleaning your Avanti HVLP Paint Sprayer, testing the machine to ensure everything operates smoothly before embarking on your next project is crucial.
This step is essential to verify the effectiveness of your cleaning and to avoid potential mishaps while painting.
A systematic test will help you identify if there’s a need for further cleaning if any adjustments are required, or if you have to troubleshoot common issues.
Let’s walk you through the process:
Conducting a Test Spray
Bold action is required to ascertain if the cleaning was successful. To initiate, perform a test spray on a scrap piece of material:
- Preparation: Secure a sizeable, expendable surface, preferring materials akin to your project.
- Execution: Engage the sprayer, deploying a consistent sweeping motion to discern the quality of the paint application.
- Assessment: Examine the coating for uniformity and look for abnormalities that might suggest clogs or malfunctions.
Adjusting Settings
Adjustments might be in order if the spray pattern is not up to par. This is how to optimize the settings:
- Viscosity: Ensure the paint’s viscosity corresponds with the sprayer’s specifications. Adjust if required.
- Air Pressure: Tweak the air pressure, increasing or decreasing it, until the desired spray pattern and paint flow are achieved.
- Nozzle: Verify the nozzle is appropriate for the paint and project. Swap it out if it does not match the requirements.
Troubleshooting Common Issues
Encountered a hitch during the test spray? Employ these troubleshooting tips to resolve standard problems:
| Issue | Possible Cause | Solution |
|---|---|---|
| Uneven Spray | Partially blocked nozzle or air cap | Revisit the cleaning procedure, focusing on affected areas |
| Low Pressure | Inadequate air supply or worn parts | Check the air compressor and replace worn components |
| Spitting | Excess paint in the nozzle or air entering the fluid | Clean the nozzle and check for leaks |
Regular cleaning and maintenance paired with thorough testing post-cleanup are the cornerstones for optimizing the performance and longevity of your Avanti HVLP paint sprayer.
Ensure your sprayer operates flawlessly by following these diligent testing techniques.
Frequently Asked Questions
Can Vinegar Clean An Avanti Paint Sprayer?
Yes, vinegar is an effective solvent for cleaning Avanti paint sprayers. It cuts through the paint residue when soaked for a few hours. Afterward, rinse thoroughly with warm water to remove all vinegar traces.
What’s the Process for Unclogging Avanti HVLP Nozzles?
To unclog an Avanti HVLP nozzle, first remove it from the sprayer. Soak the nozzle in a solvent like paint thinner or mineral spirits. After soaking, use a soft brush to remove debris gently. Rinse well before reattaching.
How Often Should I Clean My Avanti Spray Gun?
Cleaning should occur after each use to maintain the Avanti spray gun’s performance. Regular maintenance prevents clogs and prolongs the equipment’s lifespan. Neglecting cleaning can lead to poor spray quality and equipment failure.
Where Can I Find Avanti Paint Sprayer Cleaning Instructions?
Find official cleaning instructions in the Avanti paint sprayer’s user manual. Additionally, Avanti’s website and customer service can provide guidance and best practices for maintaining their paint sprayers. Always consult the manufacturer for accurate information.
Conclusion
Maintaining your Avanti HVLP paint sprayer is crucial for optimal performance. With regular cleaning, you ensure a flawless finish on every project.
Remember to disassemble, clean, and dry each part thoroughly. Embrace this routine to prolong your sprayer’s life and keep it operating like new.